Tuesday, February 28, 2012

25

Yesterday was my birthday, and it was great.  The past couple of years I put a lot of pressure on my birthday for it to be great and I was easily let down.  This year there was no pressure, no expectations and it was perfect. The morning started off great when my mom surprised me and booked a massage for me. After the massage I went out to lunch with my sisters and this cute little girl.

We were so close to the Sweet Tooth Fairy so we had to stop by!
Then we were off to the mall.  I got a new nude button up from H&M that I'm loving. 

 After shopping I met up with the love in my life and my fam for take out and the bachelor ( I can't believe he didn't give her a rose). Here are some pictures of some of the goodies I got. 
I am so excited to try this cake pop maker

You can never go wrong with MAC 


By far my most favorite present was from Hailey.  She drew this picture of the two of us.  As I was unfolding the picture this penny fell out. She looked at me with the biggest smile.  She was so proud that she gave me money. The best part about this story is she counted all the money in her piggy bank over the weekend, she has $53. I guess all she could spare was a penny! Oh I love that girl. 
Pin It!

Monday, February 27, 2012

Happy Birthday Christy!! :)

today is christy's birthday!! everyone needs to flood her phone with birthday wishes :)or feel free to comment here! christy- i say it all the time but you're the best best friend a girl could ask for. i hope your day is amazing. were like an old married couple with how many times we talk a day and always checking in with each other and i wouldn't have it any other way ;) i don't know what I'd do without you in my life. thanks for getting pregnant with me so our girls can be best friends just like us! love you!!


we have way too many pictures of us together :) these are a few of my favorites
Pin It!

Saturday, February 25, 2012

Burlap Frames


When Chelsie and I went to the DI we found  some lovely picture frames. I think I paid around a dollar for each frame. Chelsie really wanted to leave the pictures in the frame.  Don't worry Chels, I saved the pictures for you!


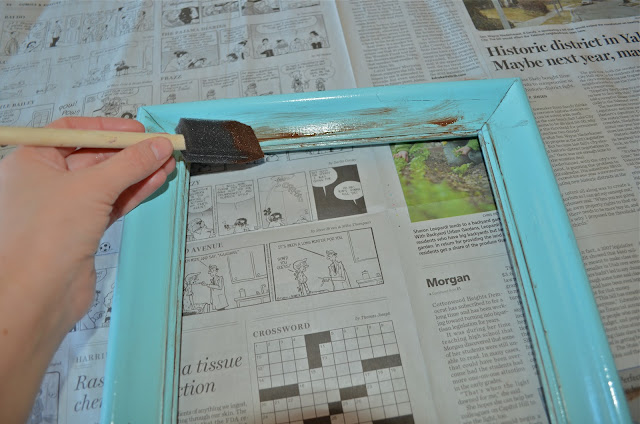
I headed over to Hobby Lobby ( I think they know me by name) and grabbed some Krylon  Blue Ocean Breeze spray praint, and burlap. After the frames were painted I applied a layer of brown gel stain (also from Hobby Lobby).  I grabbed an old rag and wiped off the excess stain.


I took out the lovely pictures that the frames came with, grabbed some cotton backing and burlap, and traced them to be the same size as the pictures.


I put the burlap on top of cotton and hot glued the both of them to the back of the frame.


Remember these pins I made? I am using these to decorate the frames.


And waaalaaa there you go burlap frames.  Use them for pictures, your child's art work, or a great way to hold your to do list.


I hope you like them! love, christy


I am linking up over at someday crafts
Pin It!

Thursday, February 23, 2012

DIY pins and earings


Awhile ago I made some earrings for Hailey and I using some scrap pieces of fabric. Today I wanted to make some pins for a board I am making, and I figured these earrings could double and be pins as well.
I used some old fabric, buttons, and earring posts from Hobby Lobby.  I traced the buttons on the fabric (make sure to double the size of the button). The earrings I did before were a little more time consuming.  I used cotton backing on top of the button and stitched the fabric around the button.  You can see that technique here.  This time I was in a hurry so I simply hot glued the fabric onto the buttons, then hot glued the buttons onto the earring posts. The stitching technique does give a more polished look, but I think these turned out alright. Here are the finished results!
 -Christy
Pin It!

Tuesday, February 21, 2012

summer loving {well almost}

we are missing summer so bad. so what do we do on the first day it actually snows
way too much?
go swimming!!
and being the amazing friend that i am i took hailey and my babes to the pool.
we all had so much fun.
we're going to try and go every sunday since sundays are such boring days around here :)

love- chels
Pin It!

Monday, February 20, 2012

DIY Mercury Glass


Lately I've really been loving the look of Mercury Glass, it can give any room a hint of a vintage glam look.  I dream of having a big mirror on my wall framed in mercury glass. The only problem is it's expensive!  I have seen different tutorials on how to achieve the look, so I tried them out.   Chelsie and I went to the DI and found a great selection of glass vases. These vases cost me $3 for both! The most important supply you need is Krylon's Looking Glass spray paint.

I also used Precious Metals Leafing Finish.  The first step is to spray the INSIDE of your vase with the Looking Glass spray.  This part was was a little tricky to get an even coat all over the vase and not leave streak marks.  To achieve a streak free look I sprayed a coat, then turned the vase horizontally while slowly rolling the vase.  The extra spray paint went all over the vase instead of leaving streaks straight down.  I applied 5-6 thin coats and let dry for 10 minutes.  The next step is to mix up a water and vinegar solution.  I used 3 Tablespoons of Water and 3 Tablespoons of vinegar, and poured it into a spray bottle.  I sprayed this solution over the coat spray paint.  I let it sit for about 20 seconds. I grabbed a plastic grocery bag and began distressing the inside of the vase. You can rub as much of the spray paint off as you would like.  Once I got the look I wanted I took a small amount of the Precious Metals paint on a sponge brush and applied it to some of the areas where I took the spray paint off. I thought it looked a little too bare with out it.


What do you think? 
- Christy 

Pin It!

Wednesday, February 15, 2012

Glitter Keys

It's no secret that Chelsie and I have a huge love for Pinterest.  That's where we got the idea to glam up our keys and add some glitter.  These keys were very easy and a great way to tell which key goes to what. First we added a clear coat of nail polish to the top part of the key.


For the next and final step we sprinkled glitter on top of the nail polish.  Here is the finished product!


-Chelsie & Christy
Pin It!

Tuesday, February 14, 2012

a day for love

happy valentines day!! :) the holidays are my favorite. and no matter what i promise to ry how i wont spend way too much money and time on presents for the kids- i somehow always break those promises. the babes and i had so much fun making their valentines. { thank you pinterest }


this year kennedy really wanted a paul frank blanket. luckily target had just the one. and jagger is too young to care what he gets so the dollar aisle is my favorite. cars and sippy cups and the kid is happy for days.


and the husband came home with roses and a blank card- i asked him why he didn't write a love laced poem for me and sign it, and his respons- 'why would i write in it when you already know it's from me?' he's so romantic.


he's the granola-ish type so i got him smart water ;) jagger saw it in the aisle and yelled DADDY!!

and for christy i got her a last minute gift she needed.
happy valentines day to everyone!!
xo- chels
Pin It!

Monday, February 13, 2012

Valentines Love

Last week I noticed I had way too much glitter just sitting around my house. So i decided to make some glittered magnetic clothes pins to spice up my fridge.

All I used was a little Mod Podge, paint brush, clothes pins, magnetic strips and glitter. The Magnets had an adhesive back, so all I had to do was cut a strip and stick them on the clothes pins. I applied a thin layer of Mod Podge and sprinkled glitter across the clothes pin.


 The project took maybe 10 minutes! What do you think? Was it a success? Check back to see how Chelsie and I used the rest of this glitter!
-Christy
Pin It!

Sunday, February 12, 2012

Chapter one

We are so excited to finally be starting this blog together. We have always wanted to document our funny stories, crafts and babble about our lives. Now we have a place to store our memories
Welcome and enjoy
Chelsie & Christy
Pin It!